In this blog post, I will tell you all about an eyelash lift kit that I bought and personally reviewed. I will give you my detailed thoughts, personal analysis, and personal experiences using this lash lift kit! So, I did it again (remember when I tested out the hyaluron pen???). I was on Facebook and saw an ad for an eyelash lift kit, you know, the perm for an eyelash kit? Ya, that! Who wouldn’t want permanent curling for their lashes??? And you can do this all at home! I read and researched all I could as I patiently waited for the kit to arrive. It finally arrived after about 3 1/2 weeks! It took a LONG time to get to me. I really thought I would never get it but I did.
*This post includes my affiliate links
I know you can buy these lash kits on Amazon, but it was just a quick buy when I saw it on my Facebook page as an ad. It was more of a ‘don’t think about it just buy it‘ sort of thing late one night. I am sure most of you ladies can relate. Anyway, I was happy when it finally arrived!
Yesterday was Sunday and I decided it was a good day as any to try this eyelash lift kit out! My daughter said she would be the guinea pig and so I set everything up and soon we were starting this whole crazy process of trying to lift and curl her lashes!
Eyelash Lift Kit Review (My Personal Experience & lash kit review)
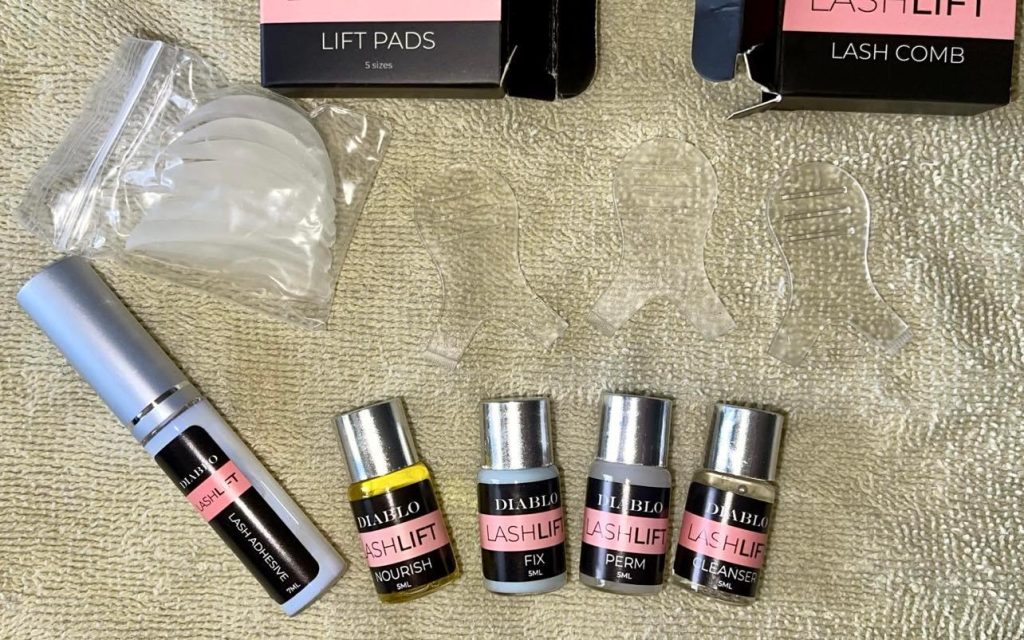
Do Research First, And Watch Videos! (lash kit review)
I made sure we watched a few Youtube videos beforehand because the directions were on the back of the box and it wasn’t really that clear on how we were to do everything. Watching a video was much easier to see how this was done. Even though the video did not have the brand of lash lift kit I had ordered, it was still the same process.
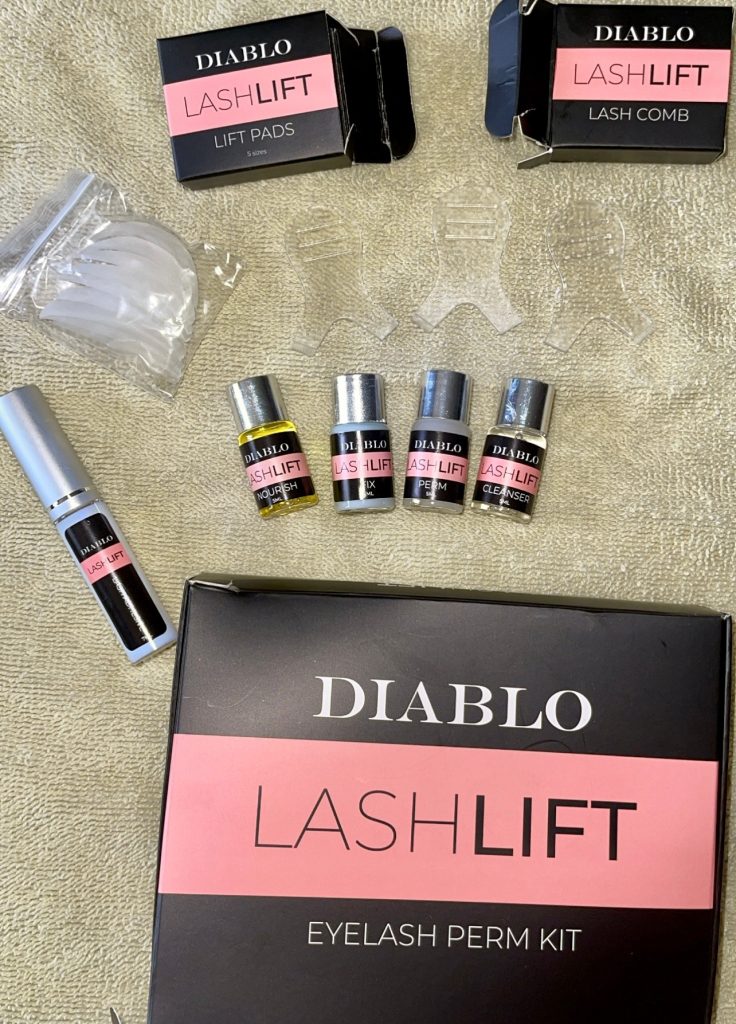
Before You Get Started, Make Sure You Have These Things On Hand
You will need these things when you are using the lash lift kit:
*Plastic Wrap (cut it into two little pieces and set them aside. These will go over your eyelashes as they are ‘setting’)
*Qtips (most if not all of these kits do not come with applicators to put on the perm solution etc, so they all recommend Qtips)
*A Towel (I had my daughter lie down on the towel and I did her lashes for her)
I think that is about it!
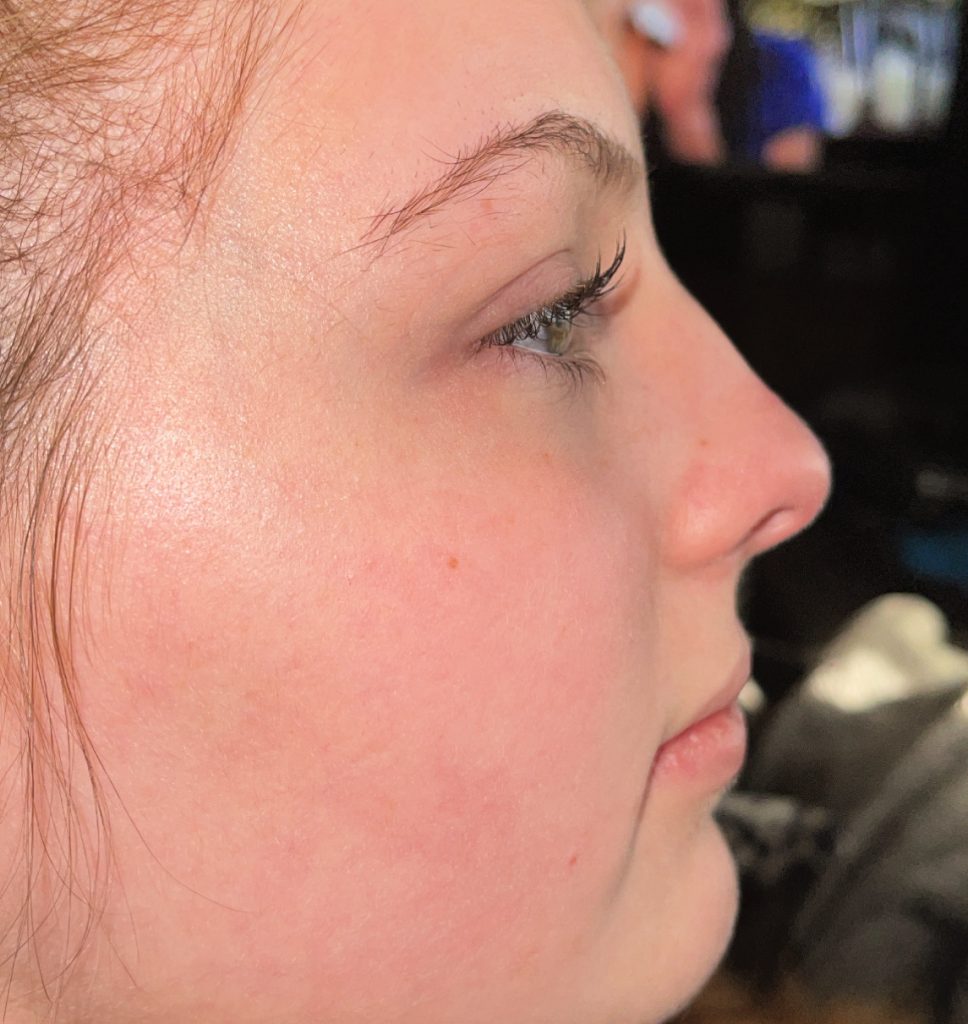
Eyelashes Before Eyelash Lift (Personal Picture)
Here are my daughter’s eyelashes BEFORE we permed her lashes. She has really long, thick eyelashes (lucky girl!) and she already had a nice curl to her lashes, but she wanted them curled more!
Let’s Get Started!
Steps to Apply the Eyelash Lift Kit (Lash perm kit):
*Clean your eyelashes!
You will first need to clean off your eyelashes using the cleanser provided in the kit OR you can use your own oil-free cleanser making sure to wipe off any oils or dirt on your eyelids and eyelashes. Make sure everything is dried off too, before going to the next step! Also, take out your contact lenses if you wear them!
*Pick Your Lift Pad Size!
Our kit came with several different lift pads to choose from. We choose the smallest one because it fits my daughter’s eyelids the best.
*Add Adhesive!
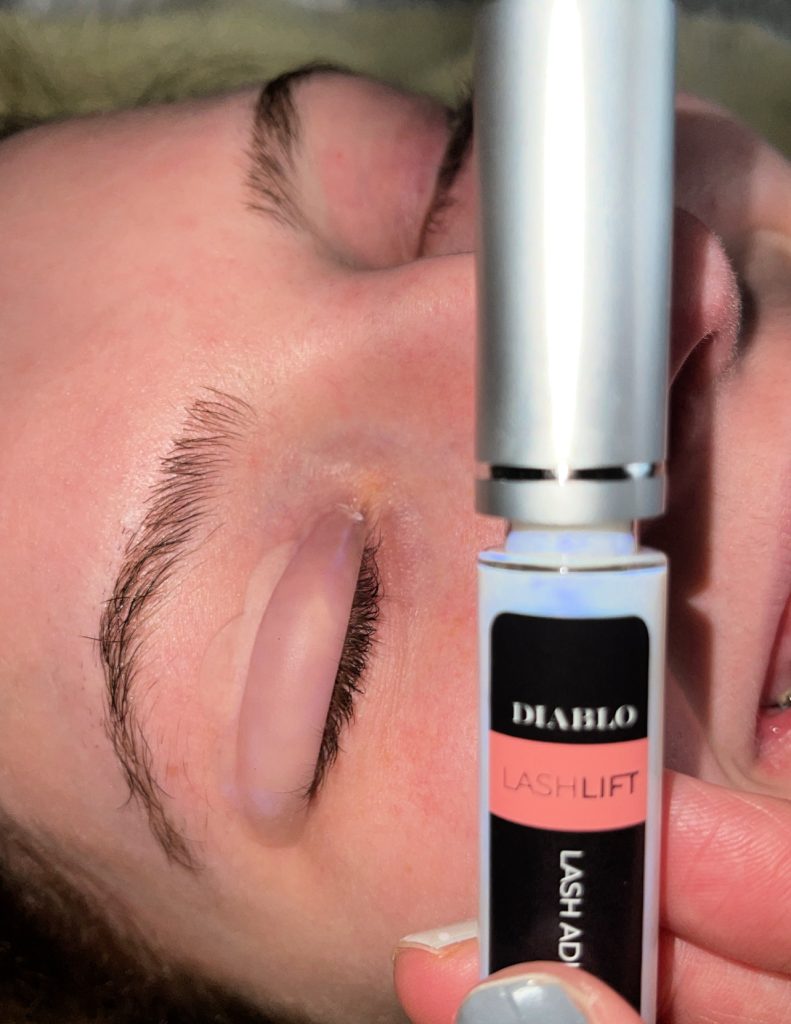
This glue REEKS!! I am not kidding you! It smells like the Geysers at Yellowstone (my daughter said this!). So be prepared for the gross smell of the adhesive and have a window open!
The kit comes with an adhesive that you will use on your EYELIDS. Apply the adhesive to your eyelids and then fairly quickly put the lift pad that you choose on your eyelid close to your lash line, pressing it down until it is on there pretty good!
You don’t want it falling off! Let it dry a bit before the next step. The rule of thumb is to wait about 30 seconds before going to the next step.
*More Adhesive!
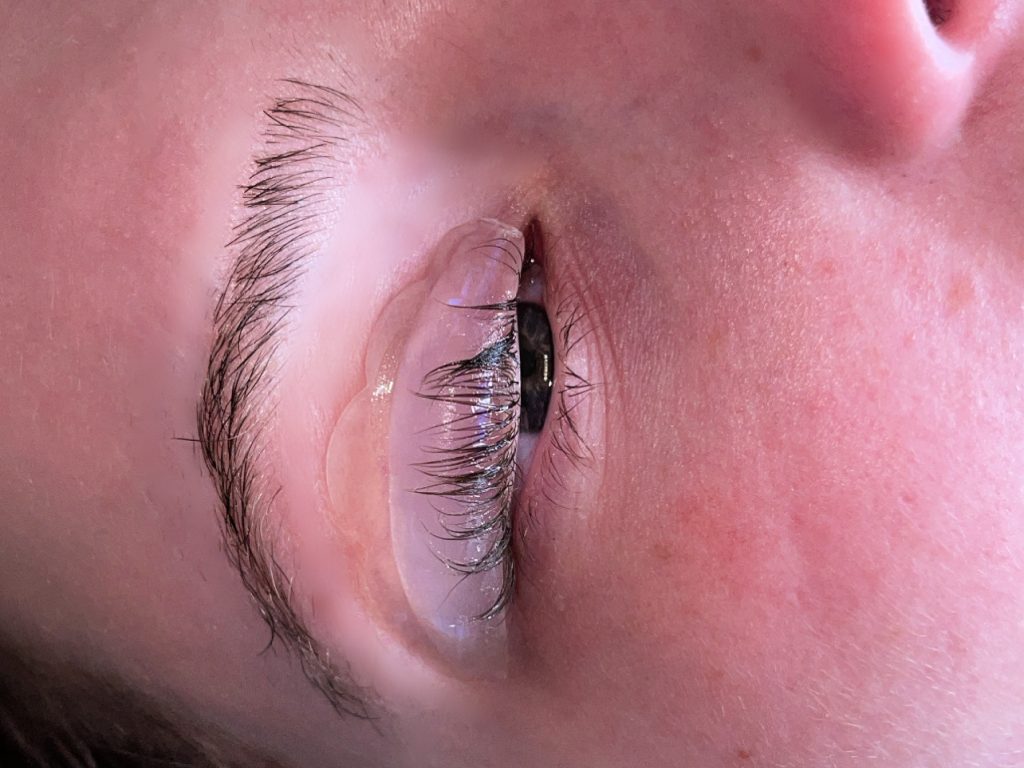
Add more adhesive to the lift pad and then take the little lash comb (it looks nothing like a comb but okay…) and press your lashes up onto the lash pad making sure they are all sticking to the lash pad!
If needed, you can always add a bit more adhesive because your lashes need to be stuck to the lash pad for the next steps! We waited another 30 seconds or more, for the adhesive to dry so that we knew the lashes were not coming undone.
*Time To Apply The Perm To Your Lashes!
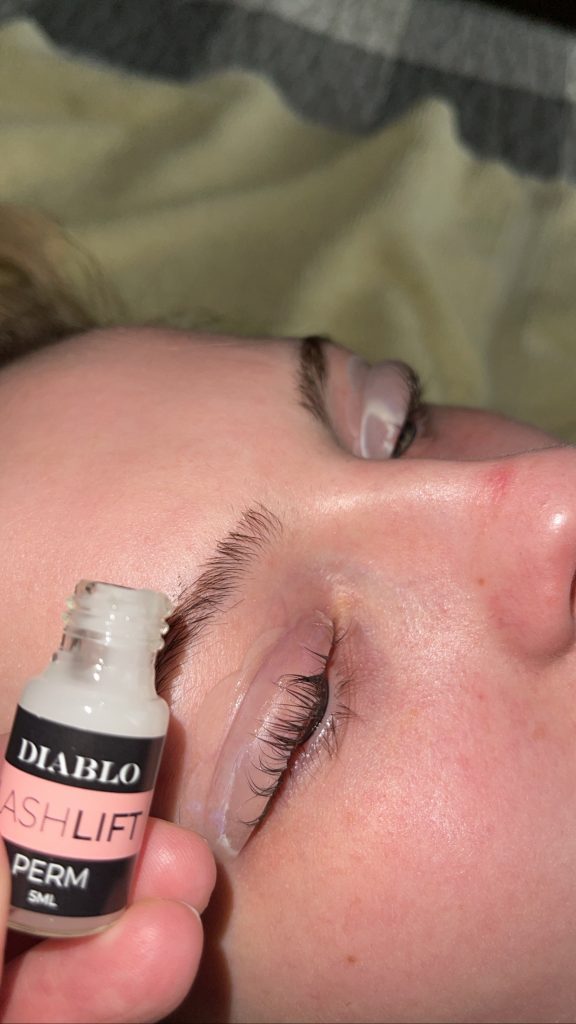
Since this is an actual perm solution, it smells REALLY bad too! So be prepared for another gross smell! Take a Qtip and open up the bottle that says “perm” on it. I put the CLEAN Qtip into the opened bottle of perm solution and then VERY carefully brushed it onto my daughter’s lashes.
The trick here is to only add the perm solution to the lash line and maybe up halfway. This is important because if you put the perm solution on the full lashes, you will risk the lashes becoming unglued to the lift pad, and then it is VERY irritating to get them to stick back in place!
Since we followed the rules, we did not have an issue with this but I know of plenty of people that said they have so just remember to do it this way only!
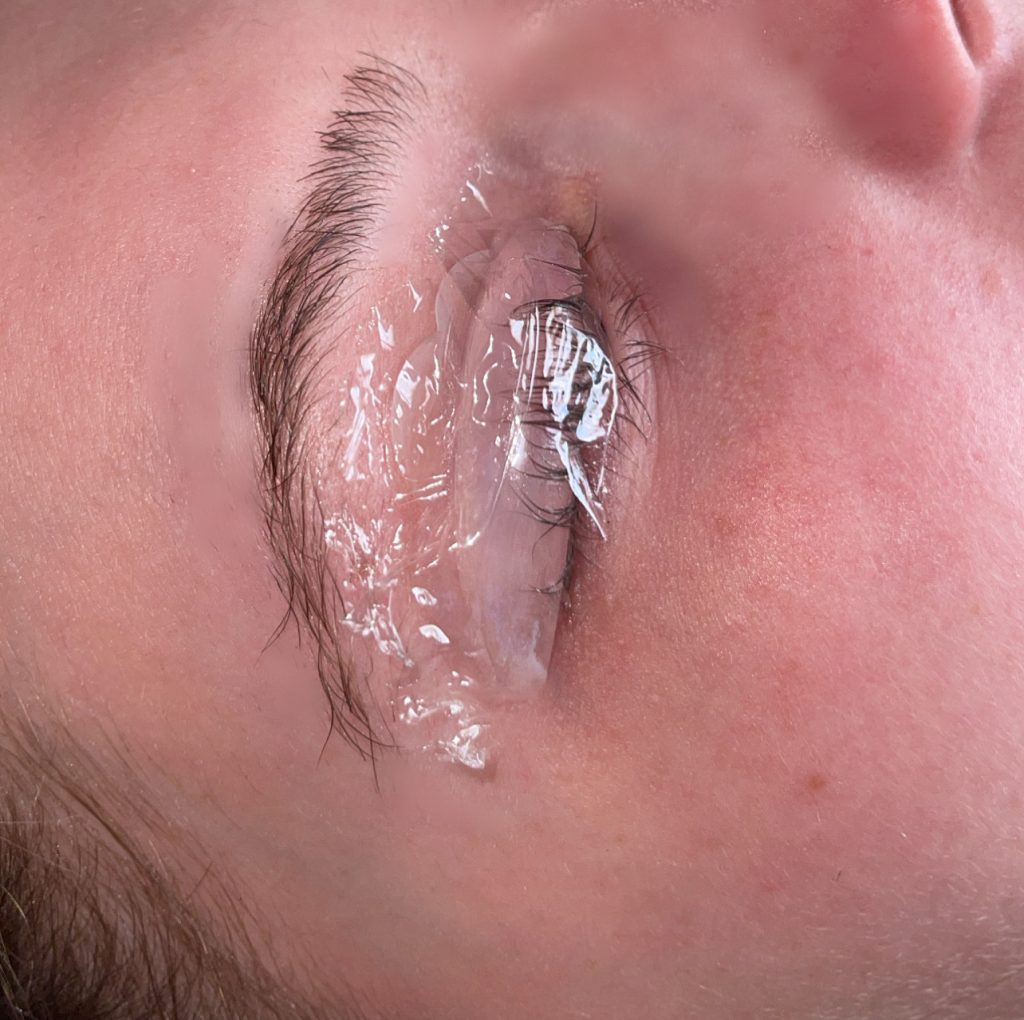
After the perm solution is applied to the lashes take the little pieces of cellophane that you cut and lay them down over the lashes covering them completely. Then, set a timer and wait 15 minutes!
*Remove Perm Solution!
The next step in this is to remove the perm solution by using a clean Qtip and gently wiping the perm solution off of the lashes (by the lash line). Make sure not to go all the way up with the Qtip, only wipe off where you put the perm solution which was at the lash line and middle of the lashes.
*Apply The Fix Lotion!
The next step after you wipe off the perm solution is to apply the ‘Fix‘ lotion. You apply it the same way as you did the perm solution! Then, cover the lashes with the cellophane again and set a timer for 8 minutes!
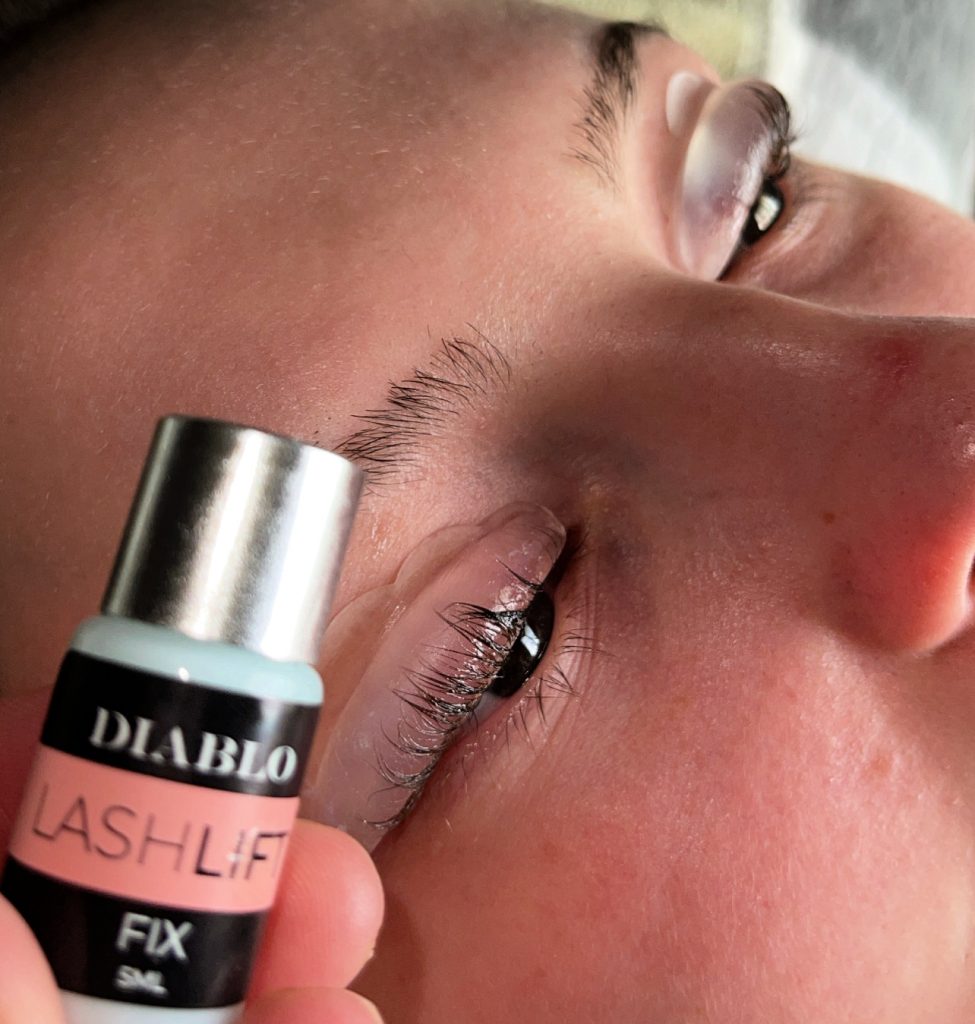
*Cleanser Time!
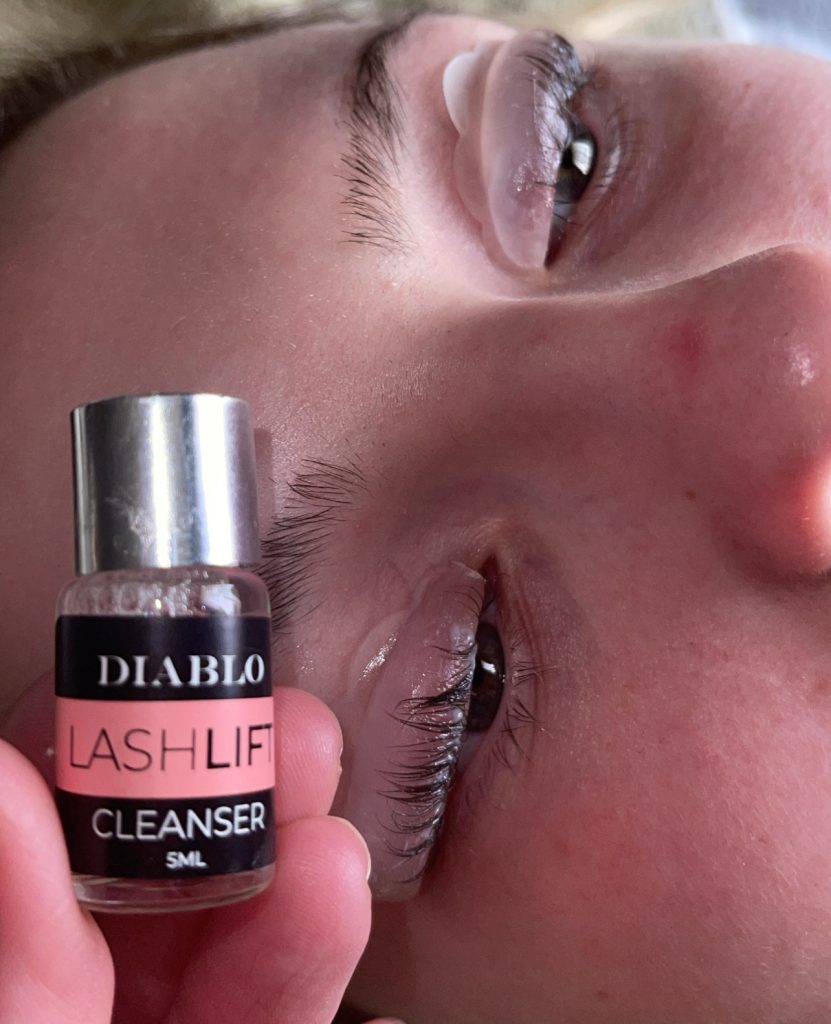
After the timer goes off, carefully pull off the cellophane from your lashes and use a clean Qtip and some of the cleanser (the kit comes with a little cleanser!) and get the Qtip damp with the cleanser, and carefully swipe the Qtip up over the length of your lashes.
You will start to see your lashes come off of the last lift pad and that is what you want. Use the cleanser and Qtip to thoroughly clean your lashes of any residue. Then, gently remove the lift pads from your eyelids. Use the Qtip with cleanser and clean off your eyelids too.
*Nourish Time!
Now is the time to nourish your lashes with the little bottle of nourishing oil that comes in the kit. Apply the nourishing oil/lotion and then comb through your lashes with a lash comb.
If you are doing your own lashes and don’t have any help, then repeat the above steps with your next eye! Easy peasy!
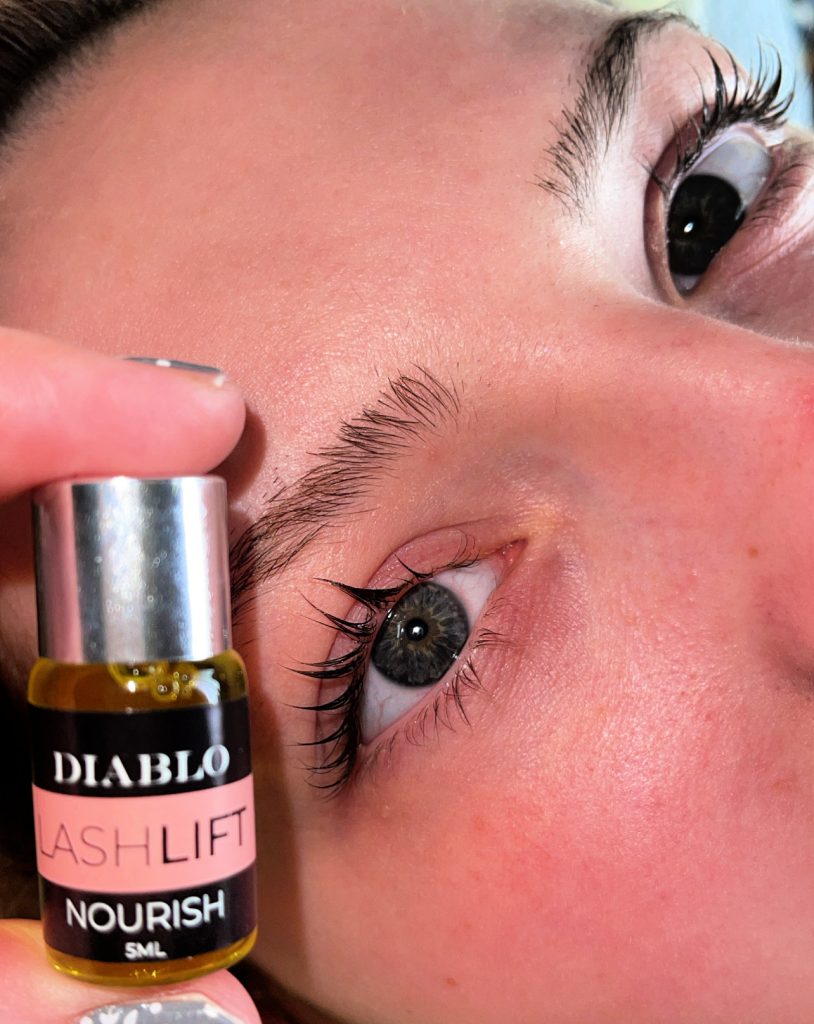
*You are all done! Yay!
This really was a very easy process. Now, I did my daughter’s lashes so it was easy for us. I am sure if you do your own lashes (have to do one at a time!), it will obviously take longer! However, either way, I am sure it would be easy! The whole process probably took 1/2 hour tops!
How Do I Care For My Lashes After Using The Eyelash Lift Kit?
There are a few things to do after you use your eyelash lift kit!
*Don’t get your lashes wet for the first 24 hours (just like a perm!)
*Steam is okay after 24 hours but it might weaken the curls
*Be gentle with your lashes
*No eye makeup or lotions for the first 24 hours
*Avoid waterproof mascaras for a while
*Use an eyelash serum or oil daily to help strengthen your lashes. This is not necessary but only a suggestion! I love Grande Lash Serum and that is what I use. However, castor oil is also a great way to nourish your lashes!
Precautions!
Here are some things worth mentioning!
*Wait at least 4 weeks between eyelash perms!
*Don’t use this if you have lash extensions
* Do not use if you have red eyes or any other eye conditions
*Avoid using on irritated skin
*Stop using immediately if your skin becomes red, irritated, swollen, or itchy
*Always do a patch test first
*If red or irritation appears, consult your doctor
*Avoid direct contact with your eyes! If you get it in your eyes, immediately rinse it with cool water
*Keep out of reach of children
So, How Did My Daughter’s Lashes Turn Out????
Of course, you are all here and reading this blog post because you want to know HOW my daughter’s eyelashes turned out, right? Well, her eyelashes are of regular length and they turned out really pretty!
You can definitely tell they are lifted and curled more. It really opens her eyes up and makes them pop! We loved doing this lash perming! It really does look professional and natural.
After Picture (After Doing the Eyelash Lift)
See how curled her lashes are now?? So pretty! She is very happy!
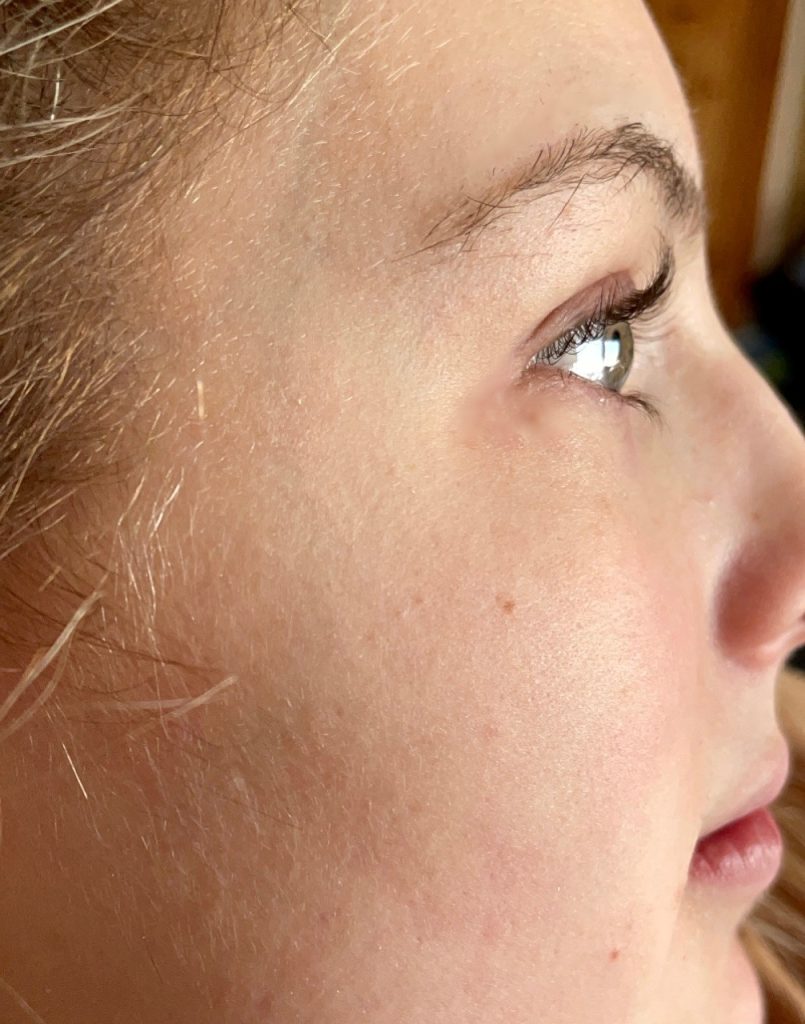
My daughter had no irritation, redness, or itching so that was good! She is very pleased with how they turned out and in a few months, we will do it again on her. But, next, it is MY turn!
She will be doing mine sometime this week. I will let you know how mine turns out too! So fun and this was a great mother-daughter bonding time for us yesterday.
We always try to do fun, pampering things when we are hanging out together! Either that or we laugh really hard at making silly videos or things like that. She is my best friend after all!
Finding The Right Eyelash Kit for You
As I said above, there are SO many lash kits out there! You just have to find one that fits you. I think they are all pretty much the same because when I was researching online, they all have the same stuff included in the kits. You can find plenty of them on Amazon.com. And, it is nice to buy them on Amazon, because of all of the reviews and ratings you can see/read.
Where Can I Buy An Eyelash Lift Kit and Perm for Eyelashes Kit?
The two kits are the same thing. They lift and curl your eyelashes, so you don’t have to go looking for two separate kits! I looked online and found lash lift kits on Amazon.com.
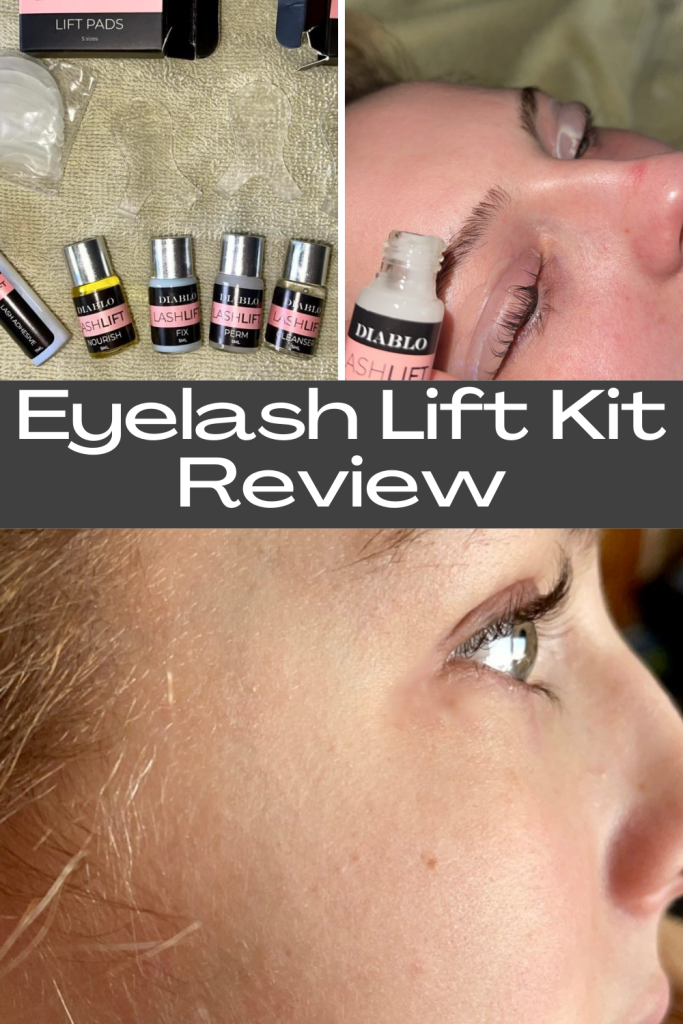
That is the first place I would look. I bought mine from a Facebook ad and my kit is called: DIABLO Lashlift Eyelash Perm Kit. I spent $40 on this kit, plus shipping. The kits usually retail for around $30-60 dollars depending on the brand you buy, so the price isn’t that bad!
Let me know if you decide to do this too! I would love to see and hear how your lashes turned out! You can check out my eyelash review kit story too!
PIN IT
Anastasija at Thirsty for Tan says
I tried the eyelash lift kit and I’m amazed by the results – definitely worth giving a shot!
Kim says
So happy to hear that!!