Fall is in full swing! The leaves are changing, you can find pumpkin-flavored everything, and it’s officially sweater weather. Since it’s getting cold outside, I’ve been looking for new fall activities to do with my kids.
I’ve found one that you guys are going to love! During Halloween, we all love Jack O’ Lanterns with carved designs, but I’ve found a fun, unique, no-fuss Easy Pumpkin DIY project that is less messy and can be done quickly!
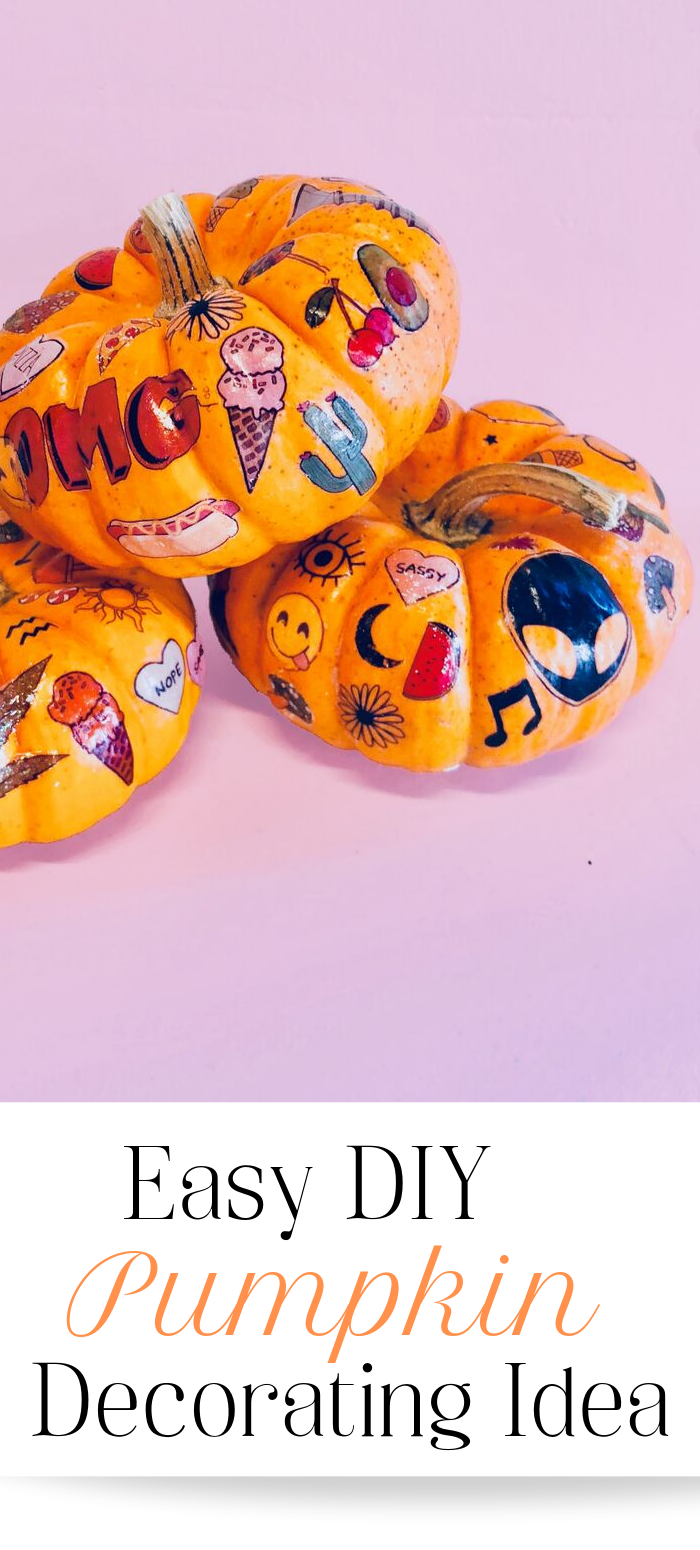
This Halloween, you can turn pumpkins big and small into individualized works of art with INKED by Dani‘s eye-catching temporary tattoos, which add some flair to your spooky Halloween decorations. The designs will help your pumpkin stand out from the rest on your block.
Easy Pumpkin DIY with INKED by Dani Temporary Tattoos
Here’s how to do this great DIY:
What You’ll Need:
-Pumpkins of any size
-Paper towel
-Your favorite INKED by Dani tattoos!

Steps:
1. Take your pumpkin and make sure it is clean and dry
2. Cut apart your favorite INKED by Dani tats, and arrange them to make a cute collage
3. Peel off the plastic on the front of the tattoo and stick face down to the surface
4. Hold a damp paper towel on the back of the tattoo for 10 seconds
5. Gently peel off the paper backing, and repeat steps 3 and 4 until your whole surface is covered
Get A Tattoo For YOU!
These temporary tattoo designs, hand-drawn by fine artist and INKED by Dani founder & CEO Dani Egna, offer a great way to express yourself without the commitment of getting a real tattoo. Try them for a fun, sleek beauty look!

*This post includes my affiliate link.
Shop!
INKED by Dani is now sold at over 15,000 local, national, and international retail locations; retailers include Target, Ulta, Forever 21, BLICK Art Materials, Francesca’s, Amazon, and Hot Topic!
There you go! Wasn’t this easy Pumpkin DIY FUN??? How do you decorate your pumpkins? Do you paint them or carve them?
PIN IT!
Dianna l Thomas says
great idea we have a couple 5 yr olds this will work well